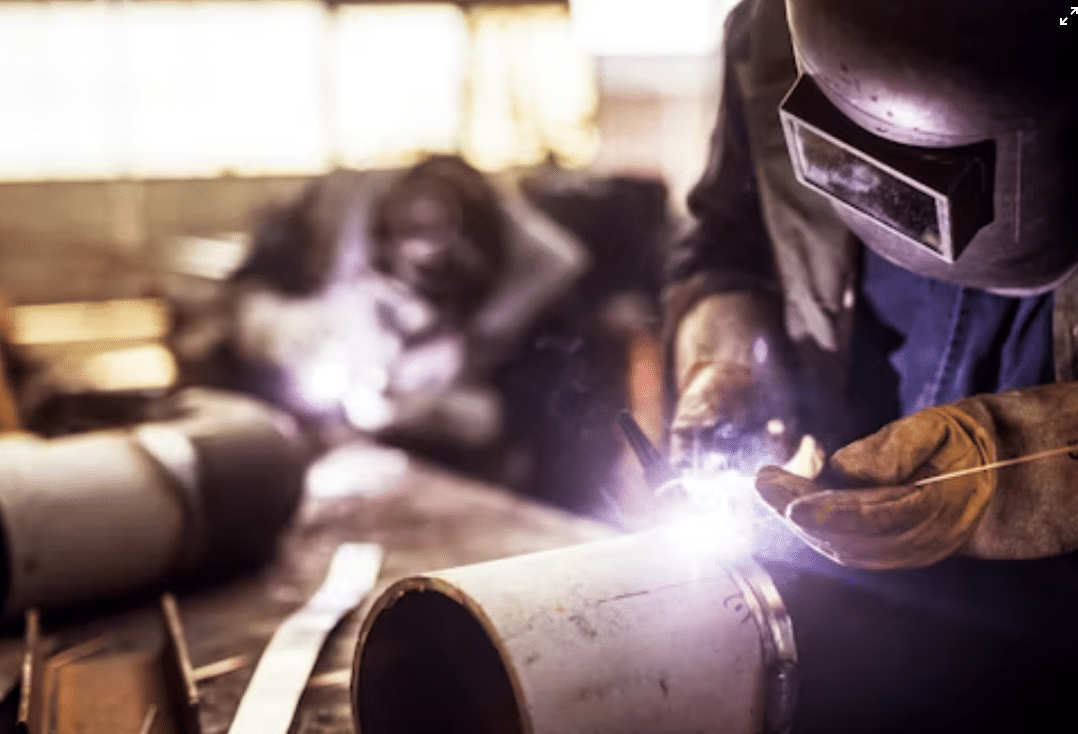
Mastering welding demands precision in techniques like welding direction, position, angle, and speed, which shape weld quality and efficiency. We will go deep into these essentials across MIG, TIG, stick, and flux-cored welding, offering practical tips and advanced insights.
What Are the Different Types of Welding Techniques?
Welding techniques—direction, position, angle, and speed—are the core principles that determine a weld’s strength, appearance, and durability.
These factors control how the weld pool forms, how heat is applied, and how the final bead looks. Different types of welding need suitable welding techniques, so master these elements ensures professional outcomes.
Why these techniques matter?
Proper techniques enhance safety, reduce material waste, and ensure welds meet industry standards (e.g., AWS D1.1 for structural welding).
Mistakes, like incorrect angles or excessive speed, can lead to defects such as porosity, undercut, or weak joints. Understanding these fundamentals is critical for welders in construction, automotive, aerospace, and beyond.
Welding Direction: Push vs Pull, Uphill vs Downhill
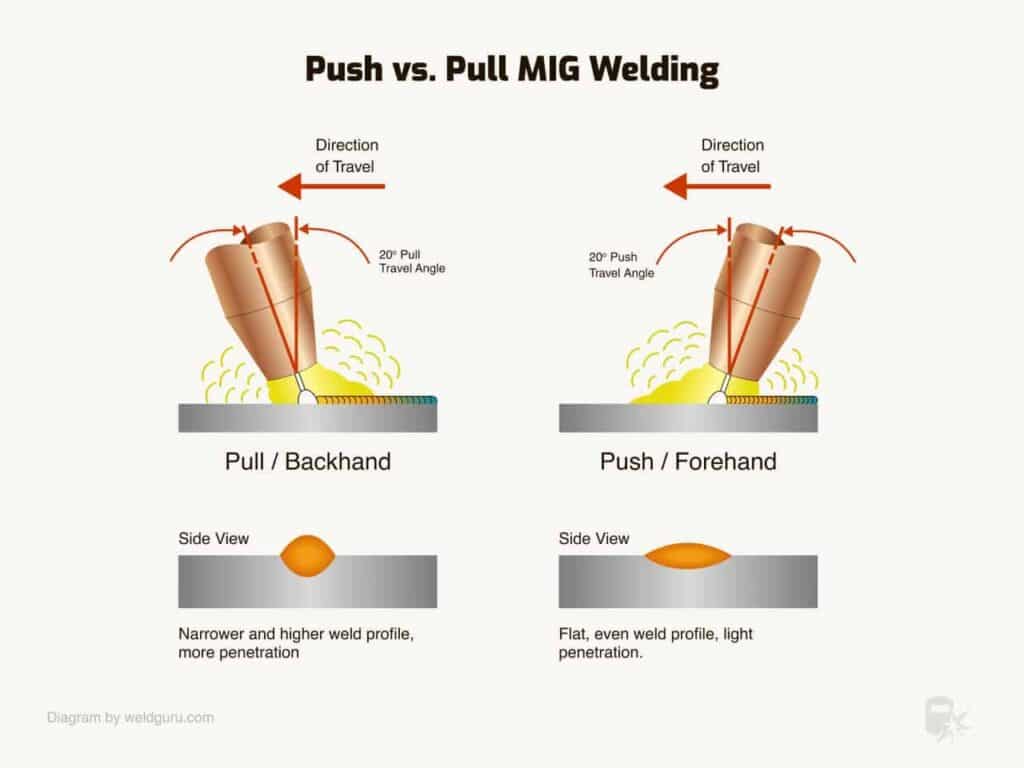
Push vs Pull Techniques
Welding direction refers to how you move the torch or tungsten welding electrodes along the joint. The two primary methods are push and pull:
- Push Technique: You angle the torch forward, pushing the weld pool. This offers better visibility and shallower penetration, and it’s ideal for flux-cored and MIG welding machines on thin materials like aluminum. For example, in MIG welding, a push technique creates a smooth, wide bead.
- Pull Technique: You drag the torch backward, pulling the weld pool. This provides deeper penetration, suited for stick and TIG welding machines on thicker materials like steel. In stick welding, pulling helps control slag and ensures a stronger weld.
| Process | Push Benefits | Pull Benefits | Best Use Case |
| MIG | Cleaner beads, less spatter | Deeper penetration | Push: Aluminum; Pull: Thick steel |
| TIG | Smoother aesthetics | Precise control | Push: Thin stainless; Pull: Titanium |
| Stick | Not recommended | Better slag control | Pull: Structural steel |
| Flux-Cored | Wide, flat beads | Stronger welds | Push: Thin sheets; Pull: Outdoor welds |
Process Tips:
- MIG: Use push for cleaner beads on aluminum or stainless steel.
- TIG: Pull for precise control on thin stainless steel or titanium.
- Stick: Pull to manage slag and maintain arc stability.
Uphill vs Downhill Welding
| Direction | Pros | Cons | Ideal Application |
| Uphill | Deeper penetration, better control | Slower, more skill needed | Vertical welds on thick steel |
| Downhill | Faster, easier for thin materials | Shallower penetration | Thin pipes, quick repairs |
Direction also varies by joint orientation, especially in vertical welding:
- Uphill Welding: Moving upward against gravity, uphill welding offers better control and deeper penetration. It’s ideal for vertical welds on thick materials (e.g., structural steel beams). However, it’s slower and requires steady hand control.
- Downhill Welding: Moving downward, downhill welding is faster and suits thin materials (e.g., sheet metal). It produces shallower penetration, which can lead to weaker welds if misapplied.
When to Use:
- Uphill: Vertical MIG or stick welding for heavy-duty applications.
- Downhill: Thin steel pipes or quick repairs with stick welding.
Troubleshooting Direction Issues
Incorrect direction causes issues like uneven beads or lack of fusion. For example:
| Problems | Solutions |
| Uneven bead (push technique) | Adjust travel angle to 10–20° and maintain consistent speed |
| Poor penetration (downhill) | Switch to uphill or increase amperage |
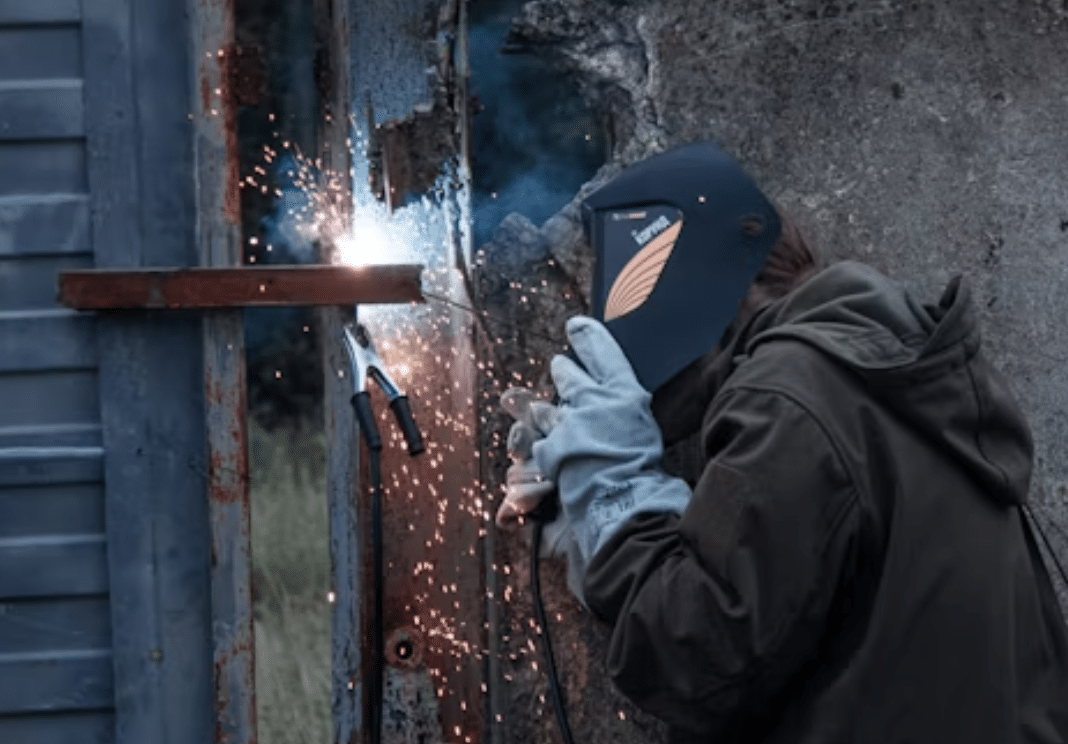
Welding Positions: Flat, Horizontal, Vertical, and Overhead
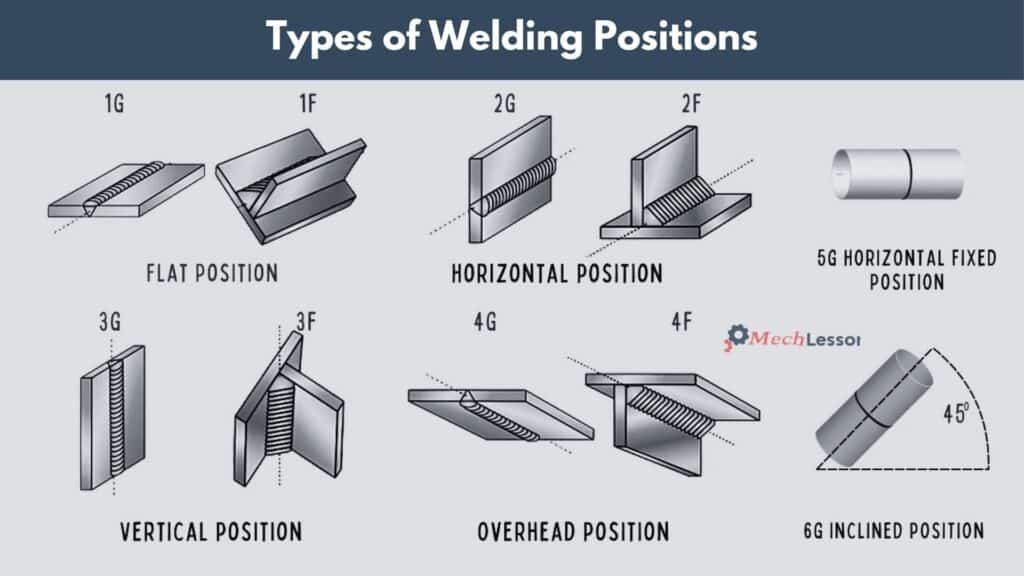
Welding positions define the joint’s orientation, per AWS/ASME standards. Each position demands specific techniques and settings to ensure quality.
- Flat (1G/1F): Welded on a horizontal surface, easiest for beginners.
- Horizontal (2G/2F): Welded along a horizontal joint, prone to sagging.
- Vertical (3G/3F): Welded up or down a vertical surface, challenging due to gravity.
- Overhead (4G/4F): Welded upside-down, requiring skill to prevent pool drip.
Different Position Techniques
- Flat: Use high amperage for fast deposition (e.g., MIG at 150–200A for 1/4-inch steel). Maintain a steady hand to avoid burn-through. Best for large, flat surfaces like plates.
- Horizontal: Angle the torch slightly upward (5–10°) to counter gravity-induced sagging. Use a weave pattern for wider joints. Ideal for fillet welds on beams.
- Vertical: Prefer uphill welding for deeper penetration. Use a triangular weave to control the pool. Adjust to lower amperage (e.g., 100–130A for stick) to prevent runoff.
- Overhead: Keep a short arc length and low amperage (e.g., 80–110A for TIG). Use small, controlled movements to avoid drips. Wear proper PPE to protect against falling spatter.
Position-Specific Tips by Process
- MIG: Flat and horizontal positions benefit from higher MIG welding wire feed speeds; vertical and overhead need slower feeds.
- TIG: Vertical and overhead require precise filler rod control to maintain a small pool.
- Stick: Use smaller electrodes (e.g., 3/32-inch) for overhead to reduce slag issues.
- Flux-Cored: Excellent for outdoor horizontal welds due to wind resistance.
Welding Angle: Work and Travel Angles
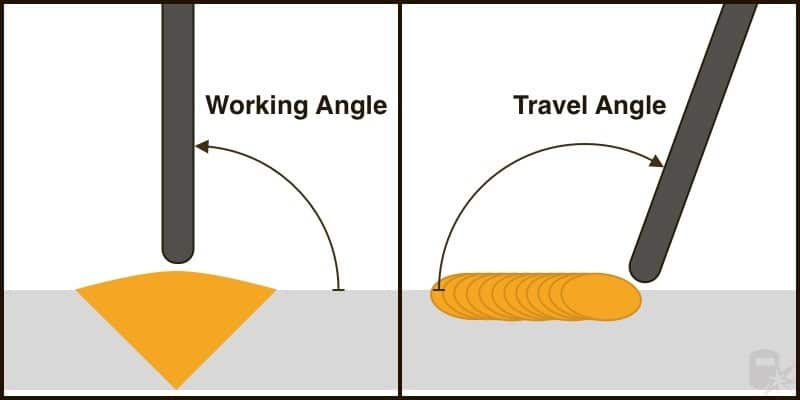
Work Angle
The work angle is the torch or electrode’s angle relative to the joint surfaces:
- Butt Welds: Aim for 90° to ensure even penetration on both sides.
- Fillet Welds: Use 45° to balance penetration between the vertical and horizontal plates.
- Adjustments: For thick materials, tilt slightly (80–85°) toward the thicker side.
Travel Angle
The travel angle is the torch’s angle relative to the direction of travel:
- Push: 10–20° forward for MIG and flux-cored, creating a flatter, wider bead.
- Pull: 5–15° backward for TIG and stick, ensuring deeper penetration.
- Impact: Too steep an angle causes undercut; too shallow reduces penetration.
Process Tips:
- MIG: 15° push for aluminum to minimize spatter.
- TIG: 10° pull for stainless steel to maintain a tight arc.
- Stick: 5–10° pull to control slag flow.
Troubleshooting Angle Issues
| Problems | Solutions |
| Undercut | Caused by excessive work angle (>45° in fillet welds). Reduce angle and lower amperage. |
| Uneven Bead | Incorrect travel angle. Adjust to 10–15° and practice consistent motion. |
Welding Speed: Balancing Heat Input and Quality
What Is Welding Speed?
Welding speed is the rate at which you move the torch along the joint, measured in mm/s or in/min. It controls heat input, penetration, and bead size. Too fast, and you get weak welds; too slow, and you risk burn-through.
Optimal Speeds by Process and Material
- MIG: 300–600 mm/min for thin steel (1–3 mm); 150–300 mm/min for thicker plates (>6 mm).
- TIG: 50–150 mm/min for precision welds on stainless steel or titanium.
- Stick: 100–200 mm/min, depending on electrode size (e.g., 1/8-inch E7018).
- Flux-Cored: 200–400 mm/min, ideal for outdoor welds on rusty steel.
Material Tips:
- Thin Materials: Faster speeds to avoid burn-through (e.g., 500 mm/min for 1 mm aluminum).
- Thick Materials: Slower speeds for deeper penetration (e.g., 200 mm/min for 10 mm steel).
Ideal Welding Speed
Use the formula: Speed = Weld Length / Time. For example, a 300 mm weld completed in 60 seconds yields 300/60 = 5 mm/s (300 mm/min). Practice on scrap metal to find your optimal speed.
Troubleshooting Speed Issues
| Problems | Solutions |
| Burn-Through | Too slow. Increase speed or lower amperage. |
| Lack of Fusion | Too fast. Slow down or increase heat input. |
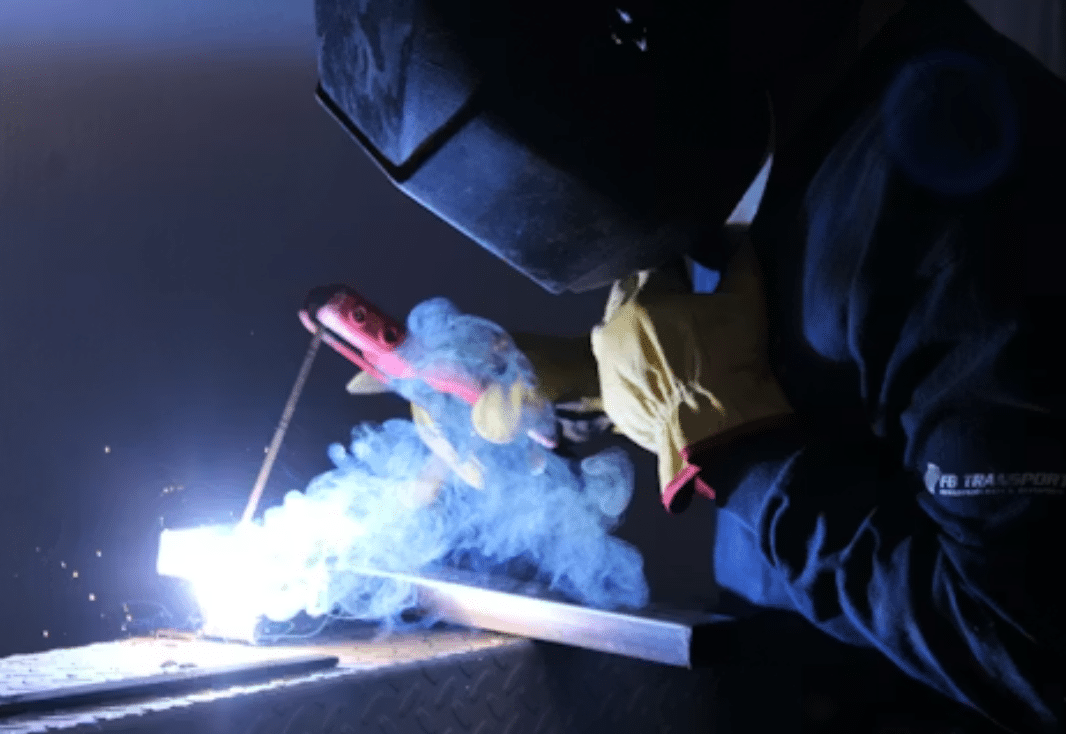
Advanced Welding Techniques and Troubleshooting
Here are some advanced scenarios for welding:
- Thin Materials: Use pulse MIG for aluminum or TIG with low amperage (50–80A) to prevent warping.
- Exotic Metals: TIG welding titanium requires argon shielding and slow speeds (50 mm/min) for clean welds.
- Complex Joints: Pipe welding in 6G (45° inclined) combines vertical and overhead techniques, using weave patterns.
Common Weld Imperfections
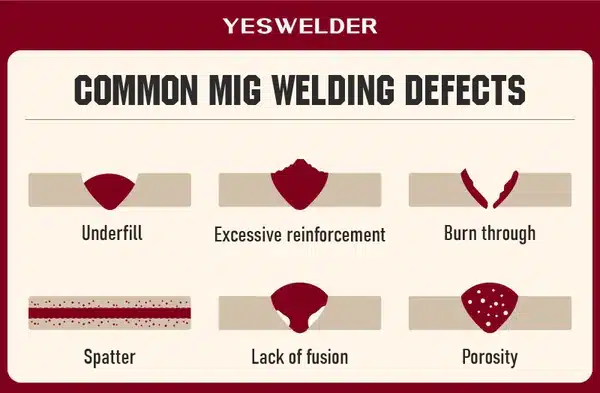
- Porosity: Caused by improper shielding gas or fast speed. Ensure proper gas flow (20–25 CFH for MIG) and moderate speed.
- Undercut: Due to steep angles or high heat. Adjust work angle to 45° and lower amperage.
- Incomplete Fusion: Results from fast speed or low heat. Slow down and increase amperage.
Process-Specific Challenges
- MIG: Spatter from improper wire feed. Adjust feed speed and use anti-spatter spray.
- TIG: Tungsten contamination from touching the weld pool. Sharpen tungsten and maintain a 1–2 mm arc.
- Stick: Arc blow from magnetic fields. Use shorter arcs and reposition the ground clamp.
Final Thoughts
Welding direction, position, angle, and speed are the pillars of high-quality welds. By mastering these techniques and troubleshooting issues, one can achieve stronger, cleaner welds across MIG, TIG, stick, and flux-cored processes.
FAQs
What is the best welding technique for beginners?
MIG welding is often considered the best for beginners due to its ease of control, clean welds, and minimal spatter. It uses a continuous wire feed, making it user-friendly for basic fabrication and repairs.
What’s the difference between push and pull welding?
Push welding angles the torch forward, offering cleaner beads with less penetration—ideal for MIG. Pull welding drags the torch back, delivering deeper penetration and better slag control—commonly used in stick and TIG welding.
How do welding positions affect weld quality?
Weld position—flat, horizontal, vertical, or overhead—affects penetration, bead shape, and difficulty. Flat is easiest; overhead is the most challenging due to gravity affecting the molten pool.
Why is travel angle important in welding?
The travel angle (typically 10–20°) determines how heat and filler are distributed. Incorrect angles can cause defects like undercut or uneven beads. Ideal angles vary by process—MIG favors push, while stick prefers pull.
What happens if welding speed is too fast or too slow?
Too fast can lead to weak joints or lack of fusion; too slow may cause burn-through or excess buildup. Proper speed balances penetration and bead formation—adjust it based on material thickness and welding process.