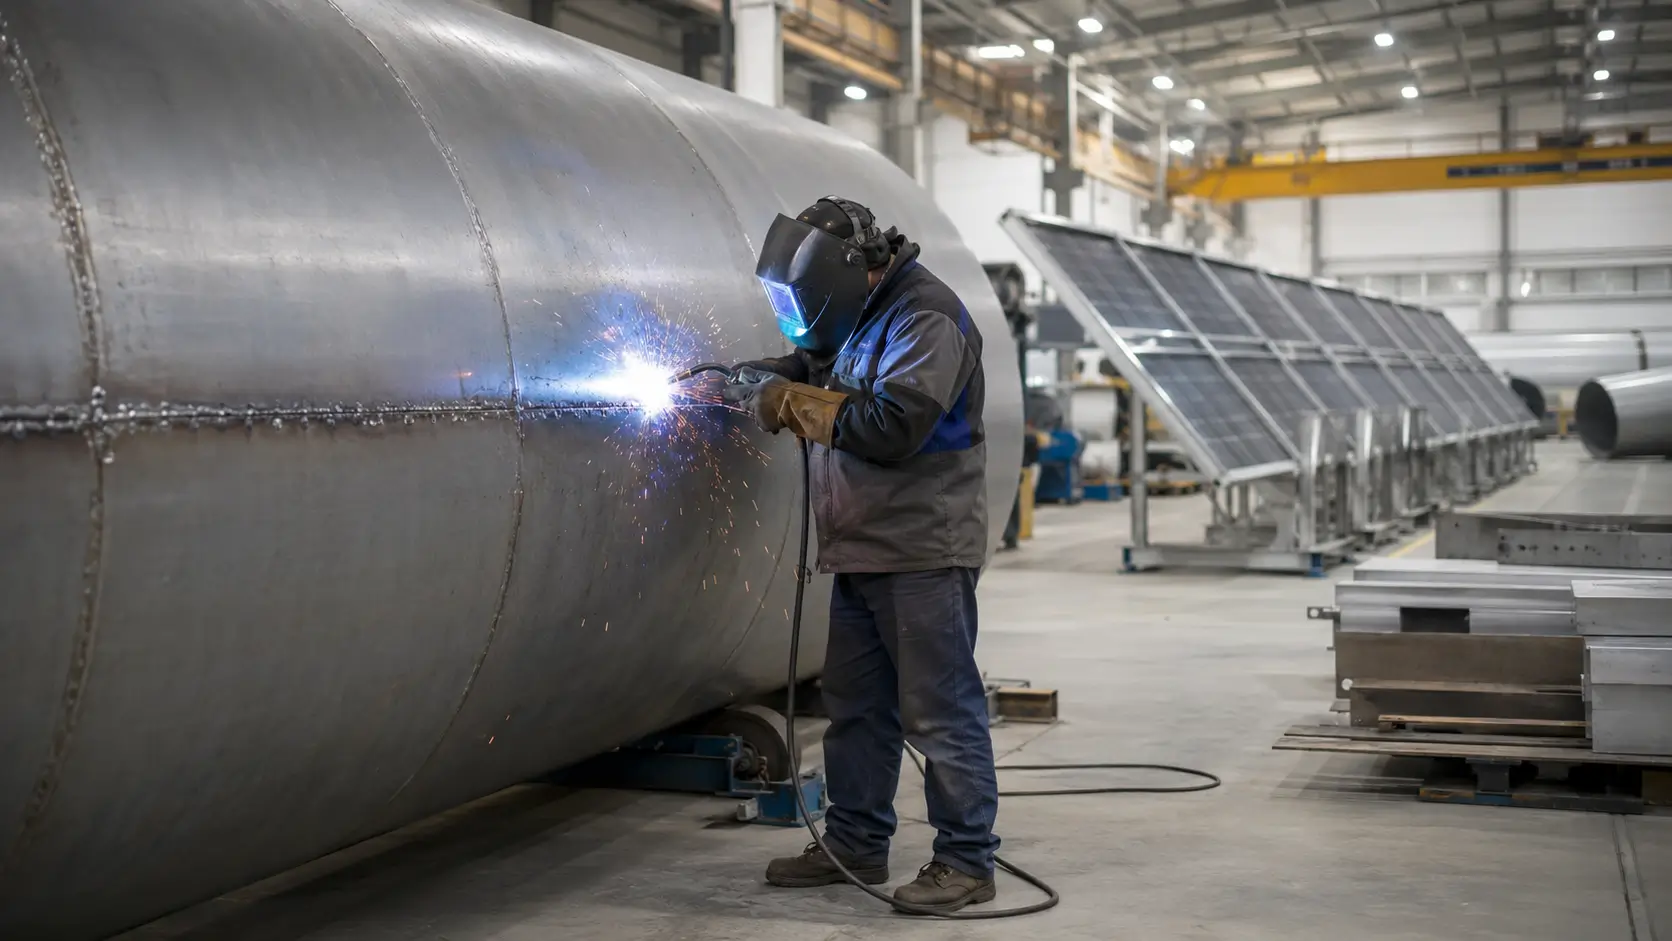
TIG welding thin materials is a heat-control job, not a power job. On metal under 1–2 mm, the margin for error is small, too much amperage, poor fit-up, or slow travel causes burn-through, warping, and oxidation fast.
The goal is to form a small, stable puddle and keep moving before the part overheats.
In this guide, you’ll learn the best pre-weld setup, pulse TIG settings, AC/DC choices, filler rod selection, and burn-through prevention for clean, controlled welds on thin sheet metal, stainless steel, tubing, and aluminum.
Why Is TIG Welding for Thin Materials So Difficult?
TIG welding thin material is difficult because thin metal reacts to heat very quickly. You do not have much room for delay, poor torch angle, wide gaps, or extra amperage. Thick steel gives you more time to watch the puddle form. Thin sheet does not.
Once a thin edge overheats, the puddle can drop out, the panel can pull out of shape, or the weld can oxidize before you correct it. That is why thin TIG work depends on control from the first arc start. You need the right amperage, small filler, clean base metal, a short arc, and steady movement.
Thin Material Has Almost No Margin for Excess Heat
Thin material has almost no margin for excess heat because there is less metal to absorb the arc energy. A setting that looks fine at the beginning of a weld may become too hot after the part warms up.
This is common on thin stainless sheet, small steel tubing, thin aluminum, and auto body panels. Stainless can discolor and warp. Aluminum can seem slow to melt at first, then suddenly form a large puddle. Thin carbon steel may burn through if you pause too long at the edge.
Burn-Through and Warping Are Different Problems
Burn-through happens when the weld puddle gets too hot and falls through the joint. Warping happens when uneven heating and cooling pull the metal out of shape.
You can have burn-through without much distortion, and you can have distortion without burning a hole. For example, a short hot weld may punch through a thin edge, while a long slow weld may keep the metal closed but bend the panel.
Material Type Changes the Heat-Control Strategy
Material type changes the way you manage heat. Thin carbon steel is more forgiving than stainless, but it still burns through with too much dwell time. Stainless steel holds heat and needs better shielding. Aluminum conducts heat away fast, then gets heat-soaked quickly. Titanium is even more sensitive. It needs clean handling and strong shielding because hot titanium reacts with air.
What Pre-Weld Setup Matters Most for Thin-Material TIG?
The most important pre-weld setup for thin-material TIG includes amperage range, tungsten size, filler rod size, shielding gas coverage, and surface cleaning. A quality tig welder gives you better control for thin work, especially when it includes pulse settings, foot pedal support, stable low-amp starts, and AC/DC capability for aluminum.
Start With a Safe Amperage Range
Use enough amperage to start the puddle quickly, then reduce heat before the edge overheats. The common “1 amp per 0.001 inch” rule can help with steel, but thin sheet often needs less heat than that once the part warms up.
Good starting ranges include:
- 0.8 mm Steel: Start around 25–35 amps.
- 1.0 mm Stainless Steel: Start around 30–40 amps.
- 1.5 mm Carbon Steel: Start around 45–60 amps, then adjust based on fit-up.
Tip: Test these settings on matching scrap before production work. Thin metal tells you the truth fast.
Use Smaller Tungsten for a Tighter Arc
Tungsten size and tip shape affect arc focus. Thin TIG work needs a small, stable arc because a wide arc spreads heat over too much surface area.
For most thin steel and stainless work, 1.0 mm or 1.6 mm tungsten works well. A sharpened tip helps narrow the arc on DC welding. A tiny flat on the tip can improve stability and reduce splitting.
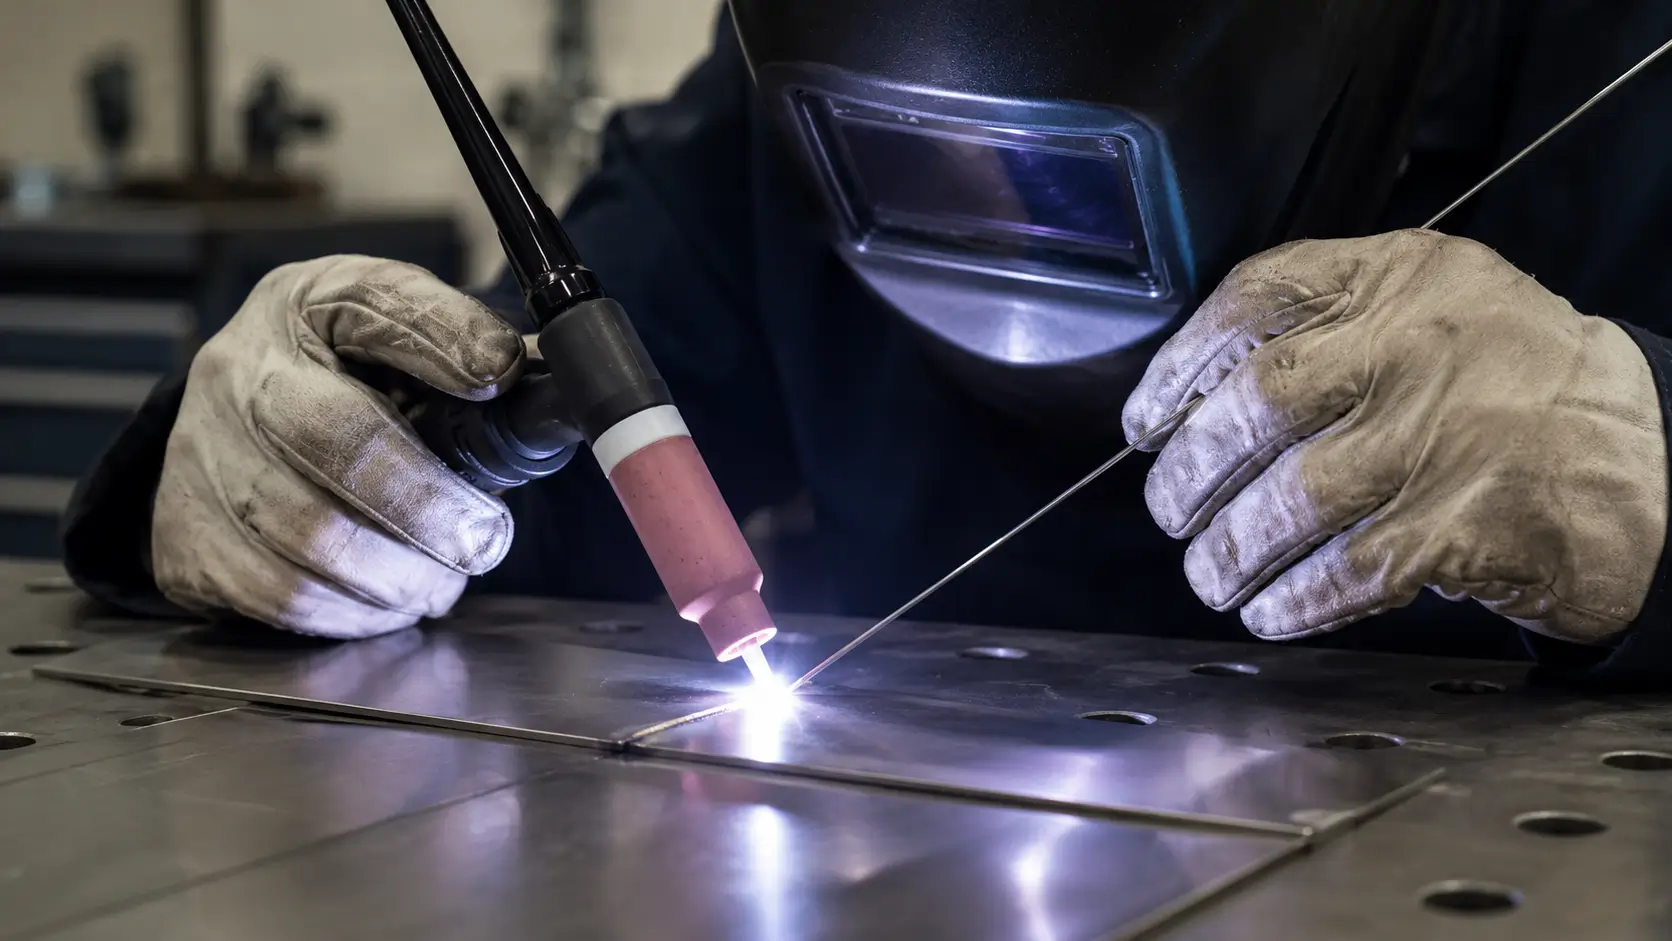
Match Filler Rod to Base Metal
Filler rod should match the base metal thickness. Oversized filler cools the puddle, forces more heat, and leaves a bulky bead.
For thin TIG welding, 0.8–1.0 mm filler can work well on very thin sheet. A 1.2–1.6 mm rod fits many light-gauge jobs. Choose the right alloy too. Mild steel, stainless steel, and aluminum need different filler metals. YesWelder Wholesale offers tig welding rods such as mild steel, stainless, and aluminum options, which helps match consumables to the base material.
Set Shielding Gas Without Causing Turbulence
Shielding gas protects the tungsten, puddle, and hot weld area from oxidation. TIG welding commonly uses argon shielding, and TWI also notes that argon is widely used for steels, stainless steel, aluminum, and titanium.
For many thin TIG jobs, use this as a starting point:
- Cup Size: #6 to #8
- Gas Flow: About 6–10 L/min
- Gas Lens: Useful for stainless, titanium, tubing, corners, and tight-access welds
Do not crank the gas too high. More flow is not always better. Too much gas can create turbulence and pull air into the shielding zone.
Surface Cleaning Before Arc Start
Clean metal welds better at lower heat. Oil, paint, oxide, mill scale, and fingerprints make the puddle less predictable and can cause porosity or poor fusion.
Degrease the joint first. Remove oxide from aluminum with a clean stainless brush used only for aluminum. Keep stainless away from carbon steel contamination. Smooth rough sheared edges because jagged edges melt unevenly.
What Are the Best Pulse TIG Settings for Thin Materials?
The best pulse TIG settings for thin materials depend on thickness, material, joint type, and travel speed. Pulse helps control heat, but it does not replace fit-up, torch control, or correct amperage.
Pulse TIG switches between high and low amperage. The high point forms the puddle. The low point lets the puddle cool slightly while the arc stays lit. This rhythm can reduce total heat input and improve bead control.
Understand the Four Pulse Controls First
Pulse TIG has 4 main controls: peak amperage, background amperage, pulse frequency, and duty cycle. Each one changes how the puddle forms, cools, and moves.
- Peak Amperage: This is the high part of the pulse. It forms the puddle and gives penetration.
- Background Amperage: This is the low part of the pulse. It keeps the arc lit while reducing heat.
- Pulse Frequency: This is how many times per second the machine switches between high and low.
- Duty Cycle: This is how long the pulse stays at peak amperage during each pulse cycle.
Use Low-Frequency Pulse for Timing and Filler Rhythm
Low-frequency pulse helps you time your movement and filler additions. A range around 0.5–2 pulses per second can help you add filler on the high pulse and move during the low pulse.
This style works well when you want a visible rhythm. It can improve bead spacing and reduce the habit of dwelling too long in one place.
Use High-Frequency Pulse for Ultra-Thin Heat Control
High-frequency pulse can tighten the arc feel and reduce puddle size on very thin material. Welders often use higher pulse rates for thin stainless, thin tubing, and delicate edges.
This can help when you need a narrow arc cone, smaller heat-affected zone, and faster travel. Still, high-frequency pulse takes practice. The puddle may look smoother, but heat still builds in the part. Keep moving and watch the edge of the weld closely.
Pulse Starting Points by Application
Pulse starting points for TIG Welding for Thin Materials should be tested on matching scrap before real work. Material type, joint style, shielding, and machine response can change the final setting.
| Application | Current | Pulse Starting Point |
| Thin Stainless Steel, 0.8–1.5 mm | DCEN | 1–2 PPS for rhythm or 30–100 PPS for tighter heat control |
| Thin Carbon Steel, 0.8–1.5 mm | DCEN | 0.5–2 PPS with 25–45% background |
| Ultra-Thin Steel or Stainless, Under 0.8 mm | DCEN | 30–200 PPS with short welds |
| Thin Aluminum, 1.0–2.0 mm | AC | 1–2 PPS for timing or higher pulse for heat control |
When Pulse Will Not Solve the Real Problem
Pulse will not fix poor joint fit-up, dirty metal, wrong filler size, or bad torch control. It is a control tool, not a shortcut.
Check the basics first. A wide gap needs more filler and heat. A long arc spreads the heat. Slow travel overheats thin edges. Dirty metal makes the puddle unstable. Once those basics are right, pulse becomes much more useful.
Should You Use DC or AC for Thin Materials?
Use DC electrode negative for thin steel, stainless steel, titanium, and most non-aluminum metals. Use AC for thin aluminum because AC helps break up the oxide layer while welding.
DC for Thin Steel, Stainless Steel, and Titanium
DCEN gives a stable, focused arc for steel, stainless steel, titanium, and many other metals. It puts more heat into the workpiece and less into the tungsten, which helps maintain a sharp electrode.
For thin DC TIG welding, keep the tungsten sharp, use a short arc, and add filler only when the puddle needs it. Thin stainless needs extra care because the back side of the weld can oxidize.
AC for Thin Aluminum
Thin aluminum needs AC because aluminum oxide melts at a much higher temperature than the base aluminum. AC helps clean that oxide while allowing the base metal to melt.
Aluminum can feel slow at first because it conducts heat away quickly. After the part warms up, the puddle can grow fast. This is where a pedal helps. Start with enough amperage to form the puddle, then ease off as heat builds.
Quick Material Reference Table
| Material/Application | Tungsten Approach | Common Filler | Peak Amperage Approach | Background Amperage | Best-Use Case / Caution |
| Thin Stainless Steel, 0.8–1.5 mm | 1.0–1.6 mm sharpened tungsten | ER308L for 304/308 stainless | Set peak high enough to form a quick puddle, then taper down | 20–40% of peak | Use back purging on sanitary, food-grade, or full-penetration welds. Watch heat tint. |
| Thin Carbon Steel, 0.8–1.5 mm | 1.0–1.6 mm sharpened tungsten | ER70S-6 mild steel rod | Use a modest peak and move before the edge overheats | 25–45% of peak | Keep fit-up tight. Oversized filler can force extra heat. |
| Ultra-Thin Steel or Stainless, Under 0.8 mm | 1.0 mm sharpened tungsten | Very small filler or no filler with tight fit-up | Use short bursts and keep the puddle very small | 15–35% of peak | Use copper backing when possible. Practice on scrap first. |
| Thin Aluminum, 1.0–2.0 mm | 1.6 mm tungsten, pointed or slightly truncated on inverter machines | ER4043 or ER5356 depending on base metal and need | Use enough peak to break through oxide and start the puddle fast | 30–50% of peak | Clean oxide before welding. AC balance and frequency affect cleaning and arc focus. |
| Thin Titanium, 0.8–1.5 mm | 1.0–1.6 mm sharpened tungsten | Matching titanium filler when required | Use the lowest peak that gives full fusion | 20–40% of peak | Needs excellent shielding, trailing gas, and clean handling. Discoloration can signal contamination. |
How Do You Prevent Burn-Through and Warping When TIG Welding Thin Metal?
Prevent burn-through and warping by reducing total heat input, improving fit-up, supporting the back side, and controlling amperage during the weld. Thin material rewards preparation, speed, and steady movement.
Use Copper Backing Bars, Chill Blocks, and Heat Sinks
Copper backing bars and chill blocks absorb heat from the weld area. They also support the puddle if the joint starts to open.
Copper is useful because weld metal usually does not fuse to it. Use backing support for butt joints, thin edges, stainless sheet, auto panels, and small tubing. Make sure the backing is clean and tight against the part. An air gap reduces heat transfer.
Focus on Tight Fit-Up and Frequent Tack Welds
Tight fit-up is one of the best burn-through controls in thin TIG welding. Gaps force you to add filler, slow down, and push more heat into the joint.
Frequent tack welds help hold the joint in place as the metal expands and contracts. On thin sheet, place tacks close enough to stop the seam from opening. Keep the tacks small because large tacks add heat before the main weld starts.
Keep a Short Arc and Move Faster Than You Think
A short arc focuses heat. A long arc spreads heat, widens the puddle, and increases the chance of burn-through.
Many thin TIG problems start when the welder lifts the torch to see better. The arc gets wider, the heat spreads, and the sheet overheats. Keep the tungsten close without dipping it into the puddle.
Travel speed matters too. Thin material does not need long puddle watching.
Use a Foot Pedal to Reduce Heat as the Part Warms Up
A foot pedal is one of the best tools for thin-material TIG because the part heats up during the weld. Thin metal often starts cool, then becomes heat-saturated in seconds.
Holding one fixed amperage can work on very short welds. Longer seams need adjustment. With a pedal, you can use more amperage to start the puddle, then reduce output as the part warms.
Use Backstep and Skip-Weld Sequencing
Backstep welding helps control distortion by welding short segments in the opposite direction of the overall weld progress. For example, the seam may move left to right, while each short segment runs right to left.
Skip welding also helps on longer seams. Instead of welding one continuous bead, weld short sections with spaces between them. Then return to fill the skipped areas after the part cools.
What Common Mistakes Ruin Thin-Material TIG Welds?
The most common thin TIG mistakes are starting too hot, dwelling too long, using oversized filler, holding a long arc, and treating pulse like a shortcut.
Starting Too Hot and Dwelling Too Long
Starting too hot can blow through the edge before the puddle becomes stable. Starting too cold creates another issue: you wait too long, and heat spreads into the surrounding metal.
The better approach is to use enough amperage to form a puddle quickly, then move. Do not sit in one place waiting for a large shiny puddle. On thin material, that usually means heat is already spreading too far.
Using Oversized Filler Rod or Poor Fit-Up
Oversized filler cools the puddle, so you add more heat. Then the base metal overheats, the bead grows, and the weld becomes harder to control.
Poor fit-up creates the same problem. A gap needs more filler and more time. Both raise heat input. For thin TIG welding, aim for clean edges, close fit-up, small filler, and enough tacks to hold the shape.
Letting the Arc Get Too Long
A long arc makes the weld hotter, wider, and less focused. It also reduces shielding quality because the tungsten sits farther from the puddle.
Fix your body position before welding. Thin TIG needs comfort and control. A stable hand position helps you keep the arc short, feed filler smoothly, and maintain travel speed.
Treating Pulse as a Shortcut Instead of a Control Tool
Pulse settings help only when the rest of the technique is already close. They cannot fix dirty metal, poor shielding, wide gaps, or slow movement.
Use pulse to reduce time at peak amperage, time filler dabs, narrow the puddle, and support steady travel. Do not keep changing pulse settings when the real issue is arc length, fit-up, or travel speed.
Conclusion
TIG Welding for Thin Materials works best when you control heat from start to finish. Good results come from the right pre-weld setup, clean material, small filler, suitable pulse settings, correct AC/DC choice, tight fit-up, steady travel, and dynamic amperage control.
A foot pedal, copper backing, frequent tacks, and backstep or skip-weld sequencing can help prevent burn-through and warping. Test every setting on matching scrap first, then adjust by material, thickness, joint condition, and weld position.
For shops, distributors, and welding teams comparing TIG machines and consumables, YesWelder Wholesale gives you a practical place to review TIG welders, rods, and related welding supplies for thin-material work.
Frequently Asked Questions
Yes, a gas lens can make a noticeable difference on very thin TIG welds because it creates smoother shielding gas flow around the tungsten and puddle.
A foot pedal is usually better for bench welding thin material because it gives smooth amperage control as the part heats up. You can start with more heat, then reduce output during the weld.
You can weld some thin stainless steel without back purging when the back side is not exposed, not part of a sanitary surface, and not required to keep full corrosion resistance.
A #6 to #8 cup works well for many thin-material TIG jobs. Smaller cups help with access, while larger cups give wider shielding coverage.
Practice on matching scrap from the same material and thickness as the real part. Clean it the same way, then test amperage, pulse, filler size, and travel speed before welding the finished piece.